1 Choose Room Type
2 Room Dimensions
3 Downlight Specification
4 Optional Electricity Cost
✓ Your Recommended Layout
📐 Ceiling Layout
🔎 Calculation Summary
Room Area = Length × Width
Required Lumens = Area × Target Lux ÷ Utilisation
Fitting Quantity = Required Lumens ÷ Fitting Lumens
Spacing is adjusted to create a balanced and symmetrical ceiling grid.
Planning recessed LED downlights is more than dividing a ceiling into equal squares. The right layout depends on your room dimensions, ceiling height, fitting lumens, beam angle, target brightness, wall position, furniture and the way you use the room.
Our Advanced Downlight Spacing Calculator helps you estimate the number of downlights required, spacing between fittings, wall offset, grid arrangement, estimated lux, total lumens and electrical load before installation.
Use the result as a planning starting point, then check the proposed positions against the manufacturer’s instructions, ceiling construction and the requirements applicable to your property.
How Far Apart Should Downlights Be?
For a typical UK home, downlights are often spaced somewhere around 1.0 to 1.5 metres apart, but there is no single spacing that works for every room.
A commonly used rule of thumb is to start with approximately half to two-thirds of the ceiling height and then adjust the layout according to the fitting’s beam angle, lumen output and the required lighting level.
For example, a 2.4m ceiling might initially suggest a spacing around 1.2–1.6m. However, this should not be treated as a fixed UK standard.
A 400-lumen fitting with a narrow beam cannot be planned in exactly the same way as an 800-lumen fitting with a wide beam.
The important factors are:
- Ceiling height
- Room dimensions
- Downlight lumen output
- Beam angle
- Desired lux level
- Wall offset
- Room function
- Ceiling colour and wall reflectance
- Furniture and fixed features
- Natural daylight
- Task areas
- Existing lighting
This is why a calculator based only on ceiling height can give misleading results.
How Many Downlights Do I Need?
There is no universal number of downlights for a room because the required quantity depends on the amount of light produced by each fitting and the brightness you want.
A basic lumen calculation can be used as a planning check:
Required lumens ≈ Room area × target lux ÷ utilisation factor
Then:
Approximate number of fittings = required lumens ÷ lumens per downlight
For example, a 20m² room requiring approximately 150 lux has a nominal requirement of:
20 × 150 = 3,000 lumens
If your selected fittings produce 600 lumens each, a simple calculation would give approximately five fittings before allowing for utilisation, room reflectance, layout and other design considerations.
The actual number may therefore be different.
This is why our calculator considers both lighting output and physical spacing instead of relying on one formula.
Downlight Spacing From the Wall
The first row of downlights should not normally be placed at the same distance from the wall as the distance between fittings.
A practical starting point for many residential layouts is approximately half the fitting-to-fitting spacing.
For example:
- Fittings spaced at 1.2m → start around 0.6m from the wall
- Fittings spaced at 1.4m → start around 0.7m from the wall
- Fittings spaced at 1.6m → start around 0.8m from the wall
However, the correct position depends on what is happening around the perimeter.
A kitchen with wall cabinets may need a different offset from an empty living-room wall. A feature wall may deliberately need closer or more directional lighting.
Why wall offset matters
If a downlight is positioned too close to a wall, its beam can create strong scalloping or uneven patches.
Move it too far into the room and the perimeter can become noticeably darker.
The objective is not simply to make every measurement identical. The objective is to produce useful and comfortable illumination.
Ceiling Height Changes Downlight Spacing
Ceiling height has a major effect on beam coverage.
As the fitting moves further away from the working surface, the light spreads over a larger area and illumination at the surface decreases.
For that reason, a 2.4m ceiling should not automatically use the same layout as a 3.0m ceiling.
Higher ceilings may require:
- Higher-output fittings
- Different beam angles
- More carefully calculated spacing
- Additional task lighting
- Different mounting positions
Our calculator uses ceiling height as one of the inputs because it affects the relationship between beam angle and coverage.
Beam Angle: One of the Most Important Inputs
Beam angle describes how widely light spreads from a downlight.
Narrow beam
Approximately 24–40°:
- More concentrated light
- Useful for accent lighting
- Can work over specific features or task areas
- Requires more careful positioning
- Can create darker areas between fittings if spaced too widely
Medium beam
Approximately 40–60°:
- Good general-purpose range
- Suitable for many residential rooms
- Useful for kitchens, bathrooms and living spaces
- Provides a balance between concentration and coverage
Wide beam
Approximately 60–120°:
- Broader light distribution
- Useful for general ambient illumination
- Can reduce obvious pools of light
- Particularly useful where a softer appearance is wanted
Beam angle should always be considered alongside ceiling height. The same 60° fitting can produce a very different coverage pattern at different mounting heights.
Lumens vs Watts: Which One Matters?
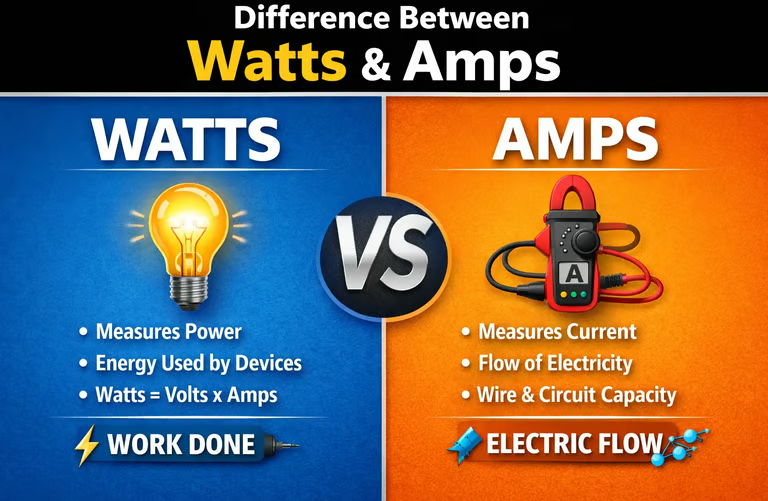
Lumens measure light output. Watts measure electrical power consumption.
When choosing downlights, do not compare fittings by wattage alone.
For example, two 6W LED downlights can produce different amounts of light depending on their design and efficiency.
A better comparison includes:
- Lumens
- Lumens per circuit-watt
- Beam angle
- Colour temperature
- CRI
- Glare performance
- Dimming compatibility
- IP rating where applicable
- Fire performance
- Manufacturer’s installation requirements
For new dwellings in England, energy-efficiency requirements are addressed through Part L guidance, including the current 2026 edition of Approved Document L.
Recommended Lighting Levels by Room
There is no single lux target for every home. The appropriate level depends on the activity taking place in the room.
As practical planning starting points:
| Room | Approximate planning range | Main consideration |
|---|---|---|
| Kitchen | 300–500 lux | Food preparation and worktops |
| Bathroom | 200–300 lux | General lighting and grooming |
| Living room | 100–200 lux | Comfortable ambient lighting |
| Bedroom | 100–200 lux | Relaxed, flexible illumination |
| Hallway | 100–150 lux | Safe movement and orientation |
| Home office | 300–500 lux | Desk and screen-based tasks |
These figures should be treated as planning guidance rather than a universal legal requirement for domestic rooms.
Commercial and workplace lighting can have different design requirements.
Kitchen Downlight Spacing
Kitchens need more careful planning than many other rooms.
The biggest mistake is to create a perfectly symmetrical grid without considering where people actually stand.
Plan around the worktop
If the fitting is directly behind the person working at the worktop, their body can cast a shadow onto the preparation area.
Instead, downlights should be positioned to illuminate the work surface effectively.
Consider wall cabinets
Standard kitchen cabinets project into the room, so the ideal downlight position may not be the same as the position used in an empty room.
Kitchen islands
An island may need its own lighting zone.
Depending on the design, this could include:
- Downlights
- Pendant lights
- Linear lighting
- Task lighting
Do not automatically place a downlight directly over every part of an island simply because the room grid suggests it.
Use layered lighting
A good kitchen can combine:
- General ceiling lighting
- Under-cabinet lighting
- Island lighting
- Pendant lighting
- Task lighting
This can produce a much more useful result than increasing the number of ceiling downlights.
Bathroom Downlight Planning
Bathrooms require additional consideration because electrical equipment is being installed in an environment where water and moisture are present.
Do not select an IP rating simply because a calculator recommends it.
Check the actual location, bathroom zones, fitting manufacturer’s instructions and the applicable electrical requirements for the installation.
Also think about the mirror.
A single downlight directly above a mirror can create unwanted shadows across the face. Dedicated mirror or vertical lighting can often produce better illumination for grooming.
The fitting must also be suitable for the location and installation conditions.
Living Room Downlight Spacing
A living room does not necessarily need a dense grid of bright downlights.
Too many fittings can make the ceiling look cluttered and produce a harsh atmosphere.
Consider combining downlights with:
- Floor lamps
- Table lamps
- Wall lights
- Reading lights
- Feature lighting
Dimmable fittings are particularly useful because the lighting requirement changes throughout the day.
Bright lighting may be useful when cleaning, while a lower setting can create a more comfortable evening environment.
Bedroom Downlight Layout
Bedrooms usually benefit from softer and more flexible lighting.
Avoid automatically putting a bright downlight directly above the centre of the bed.
A fitting directly above where someone is lying can create uncomfortable glare when looking towards the ceiling.
Instead, consider:
- Wardrobe areas
- Dressing areas
- Bedside zones
- Circulation areas
- General ambient lighting
Separate switching or dimming can make a bedroom considerably more flexible.
Home Office Downlight Planning
Home offices need enough light for focused work without producing excessive glare.
The position of your desk matters.
A symmetrical ceiling grid can still produce reflections on a monitor if the fitting is positioned poorly.
Consider:
- Desk position
- Screen location
- Window position
- Beam angle
- Glare
- Task lighting
A desk lamp can sometimes provide better task illumination than simply adding more ceiling downlights.
Dark Walls and Dark Ceilings Need More Light
Room finishes influence how much light is reflected around the space.
A room with:
- Dark walls
- Dark flooring
- Dark furniture
- Low natural daylight
can appear darker than a room with the same number of fittings and pale reflective surfaces.
Do not automatically compensate by adding large numbers of downlights.
Consider increasing useful light output, improving task lighting or using additional wall/feature lighting.
Colour Temperature Matters Too
Spacing is only one part of a successful lighting design.
Common LED colour temperatures include:
2700K: warm and cosy
3000K: warm but relatively clean-looking
4000K: cooler and more neutral
The best choice depends on the room, personal preference and other lighting already installed.
Try to avoid accidentally mixing noticeably different colour temperatures within the same visual area.
CRI: Don’t Ignore Colour Quality
CRI, or Colour Rendering Index, describes how accurately a light source renders colours compared with a reference source.
High-CRI fittings can be particularly useful in:
- Kitchens
- Bathrooms
- Dressing areas
- Art or display areas
If colour appearance matters, don’t select a fitting based only on lumens and watts.
Should Downlights Be Dimmable?
For many residential rooms, dimming is useful.
A dimmable installation allows the same lighting system to serve different purposes.
For example:
Kitchen: brighter for food preparation
Living room: medium level for conversation
Evening: lower level for relaxation
However, the downlight, driver and dimmer must be compatible.
Always check the manufacturer’s compatibility information before specifying the control equipment.
Don’t Cut the Ceiling Until You Check What’s Above It
This is one of the most important practical steps.
Before marking downlight positions, check for:
- Joists
- Timber
- Steelwork
- Pipes
- Existing cables
- Insulation
- Ventilation ducting
- Water services
- Loft access
- Other ceiling fixtures
A mathematically perfect layout may become impossible if a joist sits exactly where a fitting needs to go.
A small adjustment to several fitting positions can often produce a better real-world installation than trying to force an ideal grid.
Insulation and Heat Clearance
Recessed fittings occupy space inside the ceiling void, so heat management matters.
Electrical Safety First recommends adequate clearance around downlights for heat dissipation and warns against allowing fittings to contact or be covered by loft insulation or combustible materials unless the fitting is specifically designed and rated for that installation condition.
Always follow the specific manufacturer’s instructions.
Do not assume that every LED downlight can safely be buried under insulation.
Fire-Rated Downlights
Cutting a hole into a ceiling can affect its fire performance.
Fire-rated downlights are designed to help maintain the fire resistance of certain ceiling constructions by sealing or protecting the opening during a fire.
Electrical Safety First recommends fire-rated fittings for downlights installed into ceilings and recommends that downlight installation is carried out by a registered electrician.
The correct fitting still depends on the actual ceiling construction and manufacturer’s tested installation conditions.
UK Electrical Safety and Building Regulations
Lighting installation is not just a spacing exercise.
In England, electrical safety in dwellings is addressed through Part P of the Building Regulations. Approved Document P covers electrical safety and explains requirements around design, installation, inspection, testing and notification.
Fire safety is addressed separately through Approved Document B, while energy-efficiency requirements are covered by Approved Document L.
Importantly, these documents do not create one universal domestic rule saying that every downlight must be exactly a certain number of metres apart.
The final design must consider the particular building, installation and fitting.
If you are outside England, check the regulations and guidance applicable to your nation. Building regulations differ between England, Wales, Scotland and Northern Ireland.
How to Use Our Downlight Spacing Calculator
Step 1: Measure the room
Measure:
- Length
- Width
- Ceiling height
Use metres for the most consistent result.
Step 2: Select the room type
Choose the room closest to your intended use.
The calculator uses room type to establish a starting lighting target.
Step 3: Enter your downlight specifications
Use the actual manufacturer’s information for:
- Lumens
- Watts
- Beam angle
Do not guess these values if you already have a fitting selected.
Step 4: Set the target lux
Use the suggested value as a starting point and adjust it when the room has unusual requirements.
Step 5: Set the wall offset
Start with a sensible perimeter offset, then review the result against walls, cabinets, furniture and other features.
Step 6: Calculate
The calculator estimates:
- Number of downlights
- Grid arrangement
- Fitting-to-fitting spacing
- Wall offset
- Total lumens
- Estimated lux
- Total electrical load
- Estimated annual energy consumption
- Estimated annual running cost
- Ceiling layout
Step 7: Check the drawing before cutting
This is essential.
The calculator cannot see your ceiling.
Check the proposed positions against joists, cables, pipes, insulation, furniture and other obstructions before installation.
What If the Calculator Gives an Odd Number of Downlights?
Don’t automatically add or remove a fitting just to make the number symmetrical.
For example, if the calculation produces a 3 × 3 layout, that may be perfectly reasonable.
If it produces 3 × 4, consider whether the room’s proportions support that arrangement.
If the result clashes with a joist, kitchen cabinet or other feature, move the grid rather than cutting through an obstruction.
Good lighting design balances:
Mathematics + room use + visual appearance + installation practicality.
What If My Room Is L-Shaped?
A single rectangular calculation is not ideal for an L-shaped room.
Instead, divide the room into logical rectangular zones.
Calculate each zone separately and then review the combined lighting layout.
This approach is particularly useful for:
- Open-plan kitchens
- Kitchen-diners
- Large living rooms
- Extensions
- L-shaped corridors
The same principle applies to rooms with major changes in ceiling height.
Common Downlight Spacing Mistakes
1. Using only the ceiling-height rule
A spacing rule is a starting point, not a complete lighting design.
2. Ignoring the beam angle
A narrow beam and wide beam cannot be treated identically.
3. Using watts instead of lumens
Wattage tells you electrical consumption, not directly how much light reaches the room.
4. Creating a perfect grid without considering furniture
Lighting should support how the room is used.
5. Putting kitchen lights behind the person working
This can create shadows on worktops.
6. Forgetting wall cabinets
Cabinets change the useful position of kitchen downlights.
7. Installing directly over the bed
This can create uncomfortable glare in bedrooms.
8. Forgetting ceiling obstructions
Joists, cables and pipes can make an apparently perfect layout impractical.
9. Ignoring insulation
Incorrect clearance can cause overheating or create safety problems.
10. Cutting holes before checking the fitting
The manufacturer’s specified cut-out size must be followed.
Quick Downlight Spacing Reference
| Ceiling height | Initial spacing starting point* | Typical wall-offset starting point* |
|---|---|---|
| 2.2m | 1.1–1.4m | 0.55–0.70m |
| 2.4m | 1.2–1.6m | 0.60–0.80m |
| 2.6m | 1.3–1.7m | 0.65–0.85m |
| 2.8m | 1.4–1.8m | 0.70–0.90m |
| 3.0m | 1.5–2.0m | 0.75–1.00m |
*These are planning starting points, not UK regulatory requirements. The appropriate spacing depends on the fitting, beam angle, lumen output, room use, ceiling height and desired lighting uniformity.
Frequently Asked Questions
What is the best spacing between LED downlights?
For many residential installations, approximately 1–1.5m is a useful starting range, but the correct spacing depends on ceiling height, beam angle, lumens and room use. Use the calculator rather than relying on one fixed number.
How far should a downlight be from a wall?
A common starting point is approximately half the fitting-to-fitting spacing. Around 0.5–0.8m is often considered during residential planning, but kitchens, feature walls and other layouts may require adjustment.
How many downlights do I need for a 4m × 4m room?
There is no single correct number. The answer depends on the lumens per fitting, target brightness, beam angle and ceiling height. Enter 4m × 4m into the calculator together with your actual downlight specification.
Is one downlight per square metre correct?
Not necessarily. It is a rough rule and can produce very different results depending on the fitting’s lumen output and beam angle. A lumen-based and layout-based calculation is more useful.
Does ceiling height affect downlight spacing?
Yes. Ceiling height changes the distance between the fitting and the illuminated surface, which affects beam coverage and illumination.
Should downlights be symmetrical?
A balanced layout usually looks better, but symmetry should not override practical constraints such as joists, cabinets, furniture or task areas.
Should kitchen downlights be directly over the worktop?
Not necessarily. The position should be planned to minimise shadows from the person using the worktop. Under-cabinet lighting can also provide valuable task illumination.
Are fire-rated downlights required?
The answer depends on the ceiling construction, building requirements and the particular fitting. Fire-rated fittings are widely recommended for recessed ceiling installations because they can help maintain the fire performance of the ceiling. Always follow the manufacturer’s installation requirements.
Can downlights be covered with loft insulation?
Only when the particular fitting and installation method are designed and rated for that condition. Electrical Safety First advises against allowing downlights to contact or be covered by insulation or combustible materials unless specifically designed for it.
Are downlights suitable for bathrooms?
Suitable fittings can be used in bathrooms, but the fitting must be appropriate for its exact location and environmental conditions. Check the applicable electrical requirements, zones, IP rating and manufacturer’s instructions.
What colour temperature should I choose?
Around 2700–3000K is commonly chosen for warmer residential spaces, while 4000K can provide a cooler, crisper appearance. The best choice depends on the room and the lighting already present.
What beam angle is best?
There is no single best beam angle. Around 40–60° can be versatile for many residential applications, while wider or narrower beams can be selected for particular coverage or accent effects.
Is the calculator 100% accurate?
No calculator based on room dimensions alone can replace a complete photometric lighting design.
Our calculator provides a useful planning estimate. Actual results depend on the selected fitting, optics, mounting conditions, surface reflectance, furniture and other light sources.
Before You Cut Your Ceiling: Final Checklist
Before installation, check:
☐ Room dimensions are correct
☐ Ceiling height is correct
☐ Actual fitting lumens have been entered
☐ Beam angle is correct
☐ Target lighting level is appropriate
☐ Wall offset has been reviewed
☐ Furniture positions have been considered
☐ Kitchen worktops and cabinets have been considered
☐ Mirror and task-lighting requirements have been considered
☐ Joists have been located
☐ Existing cables and pipes have been considered
☐ Insulation requirements have been checked
☐ Fitting cut-out size has been confirmed
☐ Fire-rating requirements have been checked
☐ Bathroom location and IP requirements have been checked
☐ Dimmer and fitting compatibility has been checked
☐ The final installation has been reviewed by a suitably competent electrician
The Bottom Line
The best downlight layout is not simply the one with perfectly equal measurements.
It is the layout that provides the right amount of useful light, avoids excessive glare and dark spots, works with the room’s furniture and architecture, and can actually be installed safely.
Use the Advanced Downlight Spacing Calculator to establish a practical starting layout, then verify the result against the actual downlight specification and your ceiling conditions before any holes are cut.
For electrical work in England, Part P and other applicable Building Regulations requirements should also be considered.
If you need professional electrical services, you can learn more about Local Electrical Solution and the electrical services available across the local area.